So you want to know how to bedazzle something. Maybe it's a plain tee that deserves better. Maybe it's a graduation cap with a hard deadline attached. Either way, the question people actually ask is simpler than it sounds: how do you bedazzle a thing so the stones stay on?
That is the whole game. Sticking rhinestones down is easy. Keeping them there through a wash cycle, a car door, a full day of hugging people, that takes a method.
Everything I know about bedazzling for beginners lives on this page: the supplies that matter, the sizes worth buying, the glue differences nobody explains, and the seven steps I use on every single project. Then I'll point you at the deep-dive guide for whatever you're holding.
What Bedazzling Means
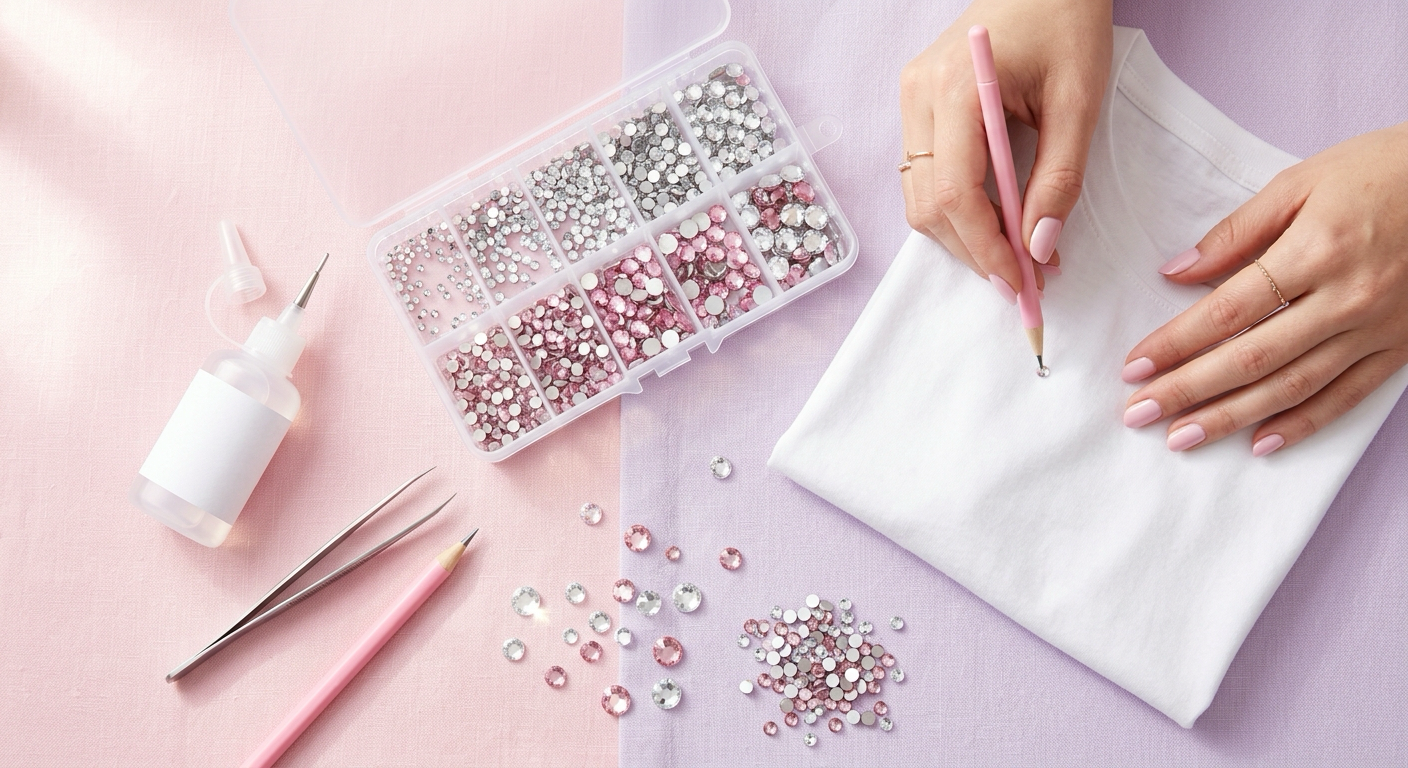
Bedazzling is decorating an object by attaching rhinestones to its surface in a pattern. That's it. The stones are flat on one side (flatback) so they sit tight against fabric, leather, plastic or metal, and faceted on top so they throw light. You attach them with glue, with heat, or with a needle and thread. This guide walks the glue route, the one that works on almost everything — plus hotfix where heat genuinely wins. Heat and needle each get a full walkthrough in the 3-methods guide.
What You'll Need to Bedazzle Something
You can start with about $25 of supplies. Here's what each thing actually does.
Rhinestone Types: Resin vs Glass
Resin (acrylic) rhinestones are plastic. They're light, cheap, and they come in bags of 5,000 to 20,000 for under $15. The facets are molded, so they sparkle in a soft, diffuse way rather than throwing hard flashes. They're also forgiving: drop one on a tile floor and it survives. Good for kids' projects, costume pieces, big full-coverage designs where you'd go broke buying glass, and anything you're making in a hurry.
Glass rhinestones have cut facets and a foil backing that mirrors light back through the stone. That's why they flash instead of glow. They're heavier, harder, and roughly 3 to 10 times the price of resin. They also survive heat and washing better because glass doesn't cloud or scratch the way acrylic does.
My rule: resin for volume and practice, glass for anything you want photographed. On a graduation cap you'll be photographed in for the rest of your life, spend the extra on glass.
Rhinestone Sizes: SS6 Through SS30
Rhinestones are measured in SS (stone size). Bigger number, bigger stone.
| Size | Diameter | Stones per square inch (full cover) | Best for |
|---|---|---|---|
| SS6 | ~2.0 mm | ~160 | Fine detail, tiny lettering, filling gaps |
| SS10 | ~2.8 mm | ~80 | Outlines, delicate scatter, nail-art scale work |
| SS12 | ~3.1 mm | ~65 | Small lettering, jewelry, phone cases |
| SS16 | ~3.9 mm | ~40 | The workhorse. Clothing, shoes, most designs |
| SS20 | ~4.7 mm | ~29 | Bold outlines, statement lettering |
| SS30 | ~6.4 mm | ~16 | Focal points, centers of flowers, big coverage fast |
Counts assume tight packing with no gaps. The full charts, with mm conversions and mixing ratios, live in the rhinestone size guide.
If you buy one size, buy SS16. It reads as sparkle from across a room but still curves around a letter without looking chunky.
If you buy three, buy SS10, SS16 and SS20. Mixing sizes is the single fastest way to make a beginner design look intentional. Specialist suppliers say the same thing: Rhinestones Unlimited recommends using two to three sizes to create depth rather than a flat wall of identical dots. Big stones anchor the shape, small ones fill the awkward corners.
Not sure how many to buy? Run your surface through the rhinestone calculator before you order. Full coverage eats stones at a rate that surprises everyone the first time.
Glue Types, Honestly Compared
This is where most projects are won or lost.
Gem-Tac is a water-based adhesive made specifically for gems and rhinestones. It dries clear, it stays flexible, and it cleans up with plain water while wet. The manufacturer states a one-hour dry time and a 24-hour full cure, and notes it works best with flatback crystals rather than hotfix ones, because hotfix stones carry a heat-activated coating that fights liquid glue. It's the friendliest option for fabric and the one I reach for on hand-washed cotton pieces. Low odor, non-toxic, forgiving if you smear it. One catch from the label: Beacon rates it for hand washing, so for a tee that will live in the machine, E6000 Fabri-Fuse (the fabric-specific version, dry in 8 hours, machine-washable after 72) is the safer pick.
E6000 is an industrial-strength solvent adhesive. It's the strongest of the three on hard, awkward or high-stress surfaces: shoes, leather, metal, plastic. Eclectic Products lists a 24-hour cure with maximum bond strength taking up to 72 hours, plus washer/dryer safe and waterproof once cured. Trade-off: strong fumes, so open a window, and it strings like melted cheese if you rush.
B7000 is E6000's cousin, popular for phone cases, tumblers and nail work. Slightly thinner, slightly more precise out of the tube, similar solvent smell, similar 24 to 48 hour cure. Great for hard surfaces, overkill for a t-shirt.
Hotfix rhinestones skip glue entirely. They come pre-coated with heat-activated adhesive on the back. You press an applicator wand tip on each stone for 10 to 35 seconds depending on stone size, the glue melts, it's done. No drying, no cure, no fumes. The catch: hotfix needs a fabric that tolerates heat, so cotton and denim yes, delicate synthetics and anything with a plastic coating no. And you cannot glue hotfix stones on with regular adhesive and expect it to hold. That coating is the problem, not a bonus. The full head-to-head is in the hotfix vs glue-on guide.
Sew-on stones have holes or metal settings and skip adhesive entirely. Slowest option, strongest hold — the pick for sheer fabrics and pieces meant to last years. When sewing beats sticking is covered in the sew-on vs iron-on guide.
Quick version: cotton and jersey → Gem-Tac for hand-washed pieces, Fabri-Fuse for machine-washed ones. Shoes, leather, hard plastic, metal → E6000 or B7000. Denim and sturdy cotton in bulk → hotfix.
The Tools That Matter
- Wax pencil pick-up tool ($3). A wooden stick with a sticky wax tip. It grabs one stone at a time and releases it when the glue grips harder than the wax. Fine work goes ten times faster with one.
- Fine-tip tweezers ($5). For nudging a stone 1 mm left. You will nudge constantly.
- A glue bottle with a metal precision tip. Squeeze bottles with 0.5 mm needle tips turn glue application from guesswork into placing dots. Worth every cent.
- Cardboard or a silicone mat. Goes inside the garment so glue doesn't bleed to the back layer.
- A tailor's chalk pencil or heat-erase pen for marking your design lines.
- Toothpicks and cotton swabs for cleaning glue off the top of a stone before it sets.
How Do You Bedazzle Something? The 7-Step Method
Same seven steps for every project I've ever done. A tumbler and a t-shirt differ in glue and drying position, not in process.
Step 1: Plan the Design Before You Open the Glue
Sketch it on paper first, at actual size. Trace the item's outline if you can, then draw inside it.
Two rules save beginners from regret. First, odd numbers and asymmetry read better than perfectly balanced rows. A scatter that fades from dense to sparse looks designed. A uniform grid looks like a mistake. Second, outline before you fill. Bedazzling a shape's border with SS16 and leaving the middle bare is faster, cheaper, and honestly more wearable than full coverage.
Count your stones now. A pocket outline on jeans runs 200 to 300 stones. A scattered neckline on a tee, 120 to 250. Full coverage on a graduation cap, 3,000 to 3,500 at SS16. Order 20% more than you calculate — you'll lose some to the carpet and reject some for chipped facets. The calculator works out how many rhinestones you need by surface, stone size and buffer. And if you're still hunting for a project, browse these bedazzling project ideas and steal one.
Step 2: Clean and Prep the Surface
Glue bonds to the surface, not to the sizing, fabric softener, oil or factory coating sitting on top of it.
New clothing: wash it once with no fabric softener, dry it fully, skip the dryer sheet. Sizing on new cotton is a bond killer.
Shoes and bags: wipe with rubbing alcohol on a cloth and let it flash off for 5 minutes. On smooth leather or coated plastic, scuff lightly with 220-grit sandpaper first so the glue has texture to grab.
Tumblers and hard surfaces: alcohol wipe, then don't touch the area with bare fingers again. Skin oil is invisible and it absolutely ruins adhesion.
Then stretch the item flat and slide cardboard inside. Fabric that's loose will move under your hand and drift your spacing.
Step 3: Map the Design onto the Item
Transfer your paper sketch to the actual surface with chalk, a heat-erase pen, or a stencil.
For lettering, print the word at the right size, tape it to the outside, and prick the outline through with a pin every 5 mm. Pull the paper away and connect the dots lightly. For symmetrical shapes, fold the item in half and mark the center line first, then work outward from it in both directions.
For full coverage you don't need a full map. Mark the boundary of the covered zone and a couple of guide lines through the middle so your rows don't slowly drift diagonal, which they will otherwise.
Step 4: Apply Glue in Dots, Not Puddles
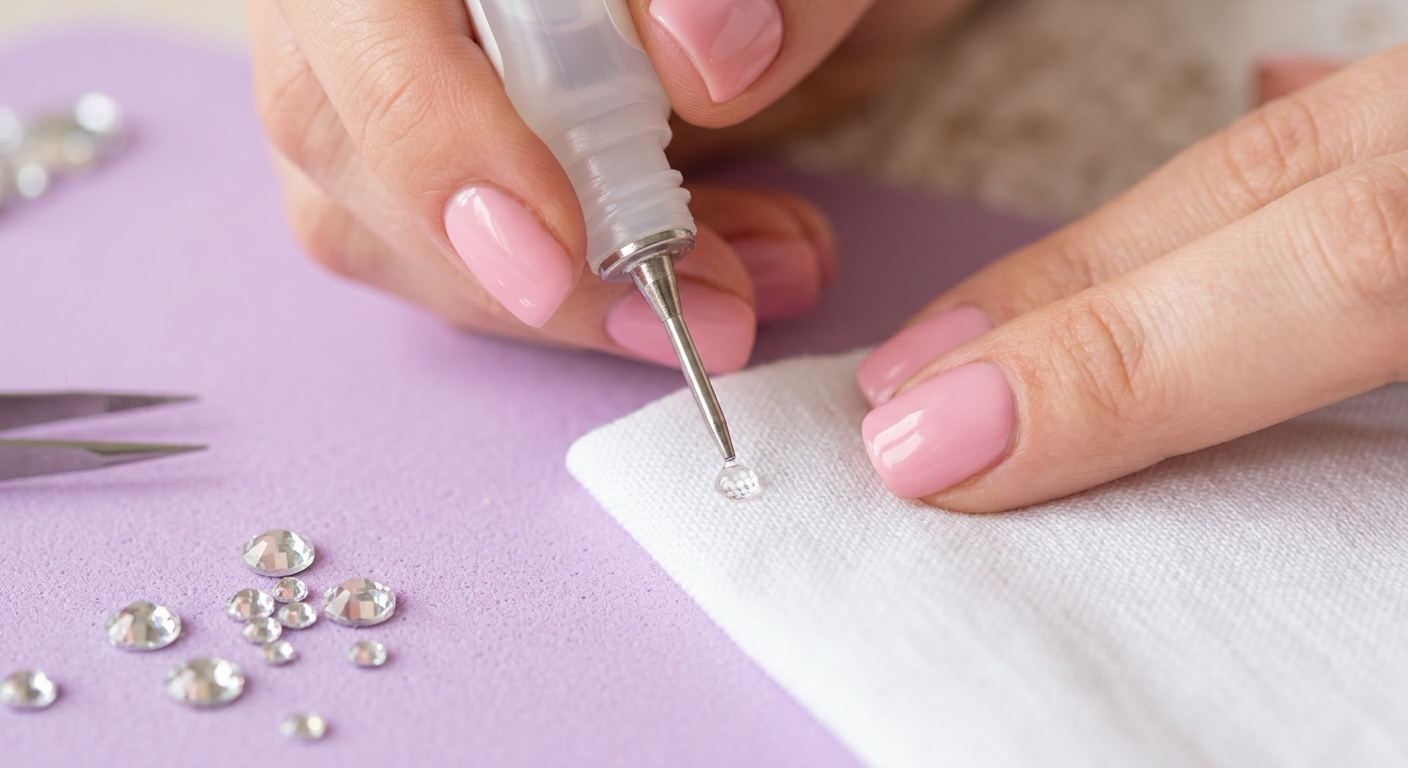
The dot should be slightly smaller than the stone, about two-thirds of its diameter. When you press the stone down, the glue spreads out to exactly the edge and stops. Too much and it squeezes up the sides and clouds the facets. Too little and only the center bonds, and the stone pops off the first time something catches it.
Work in batches of 8 to 10 dots at a time. Any more and the first dots skin over before you reach them. E6000 and B7000 get tacky in about 2 minutes. Gem-Tac gives you a bit more but not much.
On stretchy fabric, use discrete dots so the garment can still flex between stones. On rigid surfaces like a tumbler or a hard-shell phone case, a slightly larger footprint is fine because nothing is going to bend.
Step 5: Place Stones with a Wax Pencil
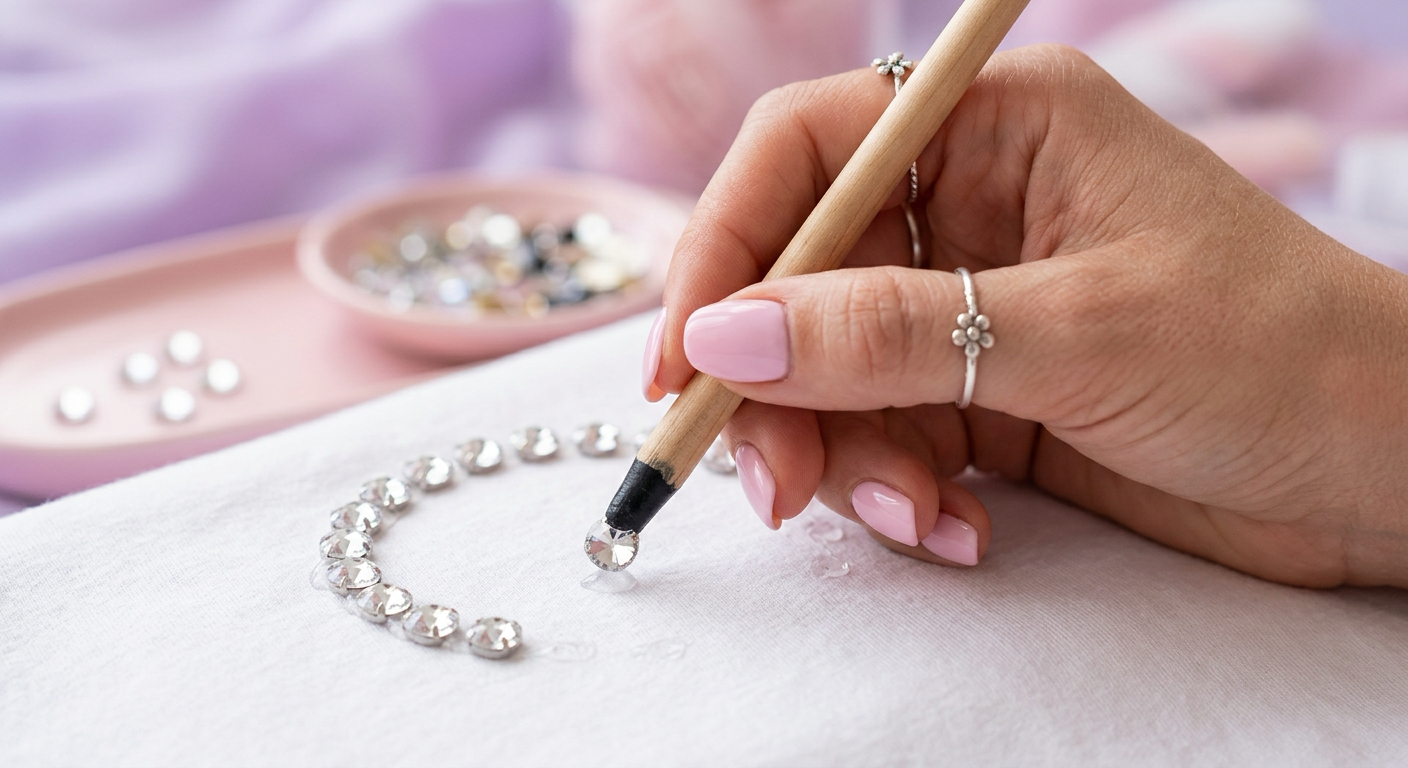
Touch the wax tip to the top of a stone, lift, position over the dot, press down gently, and lift the pencil straight up. The glue grips harder than the wax and the stone stays behind.
Press each stone with the flat of the tool or a fingertip for 2 to 3 seconds. That contact is what pushes the glue into the fibers. Skipping it is one of the main reasons stones fall off later.
Work in one direction, usually top-left to bottom-right if you're right-handed, so your hand never rests on wet stones. Set your outline stones first, then fill inward. If a stone lands crooked, fix it in the next 30 seconds while the glue is still open. After that, leave it. Prying a half-set stone tears up the fabric nap and you'll see the scar.
The fabric-by-fabric version — which method, which glue, which temperature — lives in the technique deep dive.
Step 6: Let It Dry Flat, and Wait Longer Than You Want To
Lay the piece flat and untouched. On a curved item like a tumbler or a shoe, prop it so the glued area faces up and gravity works with you, not sideways.
Timing by glue:
- Gem-Tac: touch-dry in about 1 hour, full cure at 24 hours.
- E6000: cure at 24 hours, maximum bond strength up to 72 hours.
- Fabri-Fuse: dry flat 8 hours, machine-washable after 72.
- B7000: 24 to 48 hours.
- Hotfix: cool for 30 seconds and it's done, no cure needed.
Touch-dry is not cured. A stone that feels solid after a couple of hours will still shear off under stress later that same day. If the project has a deadline, count backwards 72 hours and start then. Nothing else in bedazzling punishes impatience this hard.
Room temperature and airflow help. Humidity slows water-based glue noticeably, so in a damp room add a few hours.
Step 7: Inspect, Clean, and Seal
Once cured, run your thumb firmly across the whole design. Any stone that shifts, pull it off and redo it now. Better one loose stone today than a bald patch in a photo next month.
Clean stray glue haze off facets with a cotton swab. Water for Gem-Tac, a little rubbing alcohol for E6000 or B7000, applied to the swab and not poured on.
Sealing is optional and situational. On tumblers and shoes, a thin coat of clear water-based sealant over the glue lines, kept off the stone faces, adds real durability against water and abrasion. On clothing, skip it. Sealant stiffens fabric and it doesn't survive washing anyway.
The one-breath version of the whole method: prep the surface, dot at two-thirds, press, and wait longer than feels reasonable. The rest is design taste.
How to Bedazzle Clothes and Other Popular Projects
Same seven steps, different details. Here's what changes per project.
Bedazzling a Shirt
A t-shirt is the right first project. It's flat, it's cheap, and cotton takes glue beautifully.
Wash it first with no softener. Slide cardboard inside so glue can't bleed through to the back. Use Fabri-Fuse and SS16 stones, and start with the neckline or a single chest motif rather than a giant graphic. A scattered neckline runs 120 to 250 stones and takes 1 to 2 hours including drying setup.
The thing that trips people up is jersey knit stretch. Cotton jersey pulls in every direction, so glue in discrete dots with a gap between stones, never in continuous lines. Continuous glue creates a rigid plate on a stretchy garment, and the first time someone pulls it over their head, the plate cracks. Full details, placement maps and neckline templates in the shirt bedazzling guide.
Bedazzling a Graduation Cap
The high-stakes one, because it's a single event with a fixed date and a lot of cameras.
Grad caps are usually polyester with a stiff cardboard backing, which is a friendlier surface than it sounds. Glue holds well and the flat 9.5 x 9.5 inch top is a perfect canvas. Full coverage at SS16 is roughly 3,000 to 3,500 stones and 9 to 12 hours of work, so most people outline lettering or a year instead, which lands around 280 to 650 stones.
The real constraint is the calendar. Start three to five days out, and leave at least 24 hours of cure — 72 if you can — before the cap gets tossed in the air. Rushed caps shed stones on stage. The graduation cap guide covers lettering layouts, planning around the button, and design ideas.
Bedazzling Shoes
Shoes are the durability test. They flex, they scuff, they get wet, and they take impact from every curb you clip.
Use E6000 or B7000, never water-based glue. Prep matters more here than anywhere else: alcohol wipe, then scuff smooth leather or coated synthetics with 220-grit so the glue has bite. Stay off the flex crease across the toe box if you can, or accept that those stones will need touch-ups.
A full-coverage pair of low-top sneakers runs 4,000 to 6,000 stones at SS16 and takes a full weekend. Heels are faster: covering just the heel block on a pair of pumps is 600 to 900 stones. Cure for the full 72 hours before you wear them. Specifics for canvas, leather and heels in the shoe guide.
Bedazzling Jeans
Denim is thick, sturdy and heat-tolerant, which makes it the most forgiving fabric on this list. It's also the only one where hotfix stones are genuinely easier than glue for large designs.
Classic placements: pocket outlines at 200 to 300 stones each, a side seam stripe at roughly 40 stones per 10 inches, or a scatter down one thigh. Prewash to remove sizing, and always put cardboard between the front and back layers of a leg. Denim's weave is open enough that glue soaks through and welds the leg shut, which is a very memorable mistake to make once. Placement ideas and hotfix technique in the jeans guide.
Bedazzling a Tumbler
A curved, non-porous, frequently-handled, frequently-washed surface. Hardest of the five.
Use B7000 or E6000, never water-based glue, and never a dishwasher afterward. Alcohol-wipe the stainless steel and don't touch it again with bare hands. Work in horizontal bands, rotating the tumbler and letting each band set for 20 minutes before turning, so gravity doesn't slide your stones.
A 20 oz tumbler wrapped fully takes roughly 2,500 to 3,000 SS16 stones. Leave the top two inches bare where lips and hands go. Hand wash only, forever. Full method in the tumbler guide.
8 Bedazzling Mistakes That Ruin Projects
- Using too much glue. It squeezes up the sides, dries cloudy, and permanently dulls the stone. Dots at two-thirds of stone diameter, always.
- Not washing new fabric first. Sizing and factory finishes sit on top of the fibers. Your glue bonds to the coating, the coating lets go, the stones go with it.
- Wearing or washing it before full cure. Touch-dry at hour 1 is not cured at hour 24. Rushing this causes more stone loss than every other mistake combined.
- Gluing hotfix stones. The heat-activated coating on the back actively prevents liquid glue from bonding. Buy non-hotfix flatbacks if you're gluing.
- Skipping the cardboard barrier. Glue bleeds through cotton and denim and bonds the front of the garment to the back. Unfixable.
- Placing stones with fingers. You'll smear glue onto facets, misalign spacing, and lose stones in the carpet. A $3 wax pencil solves all three.
- Continuous glue lines on stretch fabric. Creates a rigid plate that cracks the first time the garment stretches. Discrete dots with breathing room.
- Buying one size of stone. A design in a single SS reads flat. Two or three sizes reads deliberate. This is the cheapest upgrade available.
Washing and Durability: Will It Survive?
Yes, if you cure it properly and wash it gently. Here's the routine.
Wait 72 hours after the last stone before the first wash, regardless of what the bottle says about 24. The extra time costs nothing and buys real strength.
Turn the garment inside out. This is the single most effective thing you can do. Stones then rub against the drum through fabric instead of directly.
Cold water, gentle or delicate cycle, mesh laundry bag. Hot water softens most adhesives and agitation does the rest.
No fabric softener, no bleach. Softener leaves a film that creeps under stone edges. Bleach attacks resin stones and clouds them.
Air dry flat. Tumble drying is one of the fastest ways to lose a design, because heat plus mechanical beating is the exact combination adhesives hate. One curiosity from the label: Beacon notes Gem-Tac's formula actually strengthens with dryer heat — but that applies to the hand-washed pieces Gem-Tac is rated for. Air drying stays the default across every glue.
Realistically, a well-cured glued design on a shirt handles dozens of gentle wash cycles before you're touching up the odd stone. Hotfix on denim often goes longer. Keep 20 or so spare stones and a few grams of glue in a bag with the garment, because a two-minute touch-up beats retiring the piece.
Hand-wash-only items: shoes (spot clean, never submerge), tumblers (hand wash, no dishwasher, no soaking) and anything with sealant on it.
FAQ
What do I need to bedazzle something?
Five things, about $25 total. Flatback rhinestones (SS16 is the best single size to start with), a rhinestone-appropriate glue (Gem-Tac or Fabri-Fuse for fabric, E6000 or B7000 for hard surfaces), a wax pencil pick-up tool, fine tweezers, and cardboard to slide inside garments so glue can't bleed through. A precision-tip glue bottle and a chalk marking pencil are the two cheap add-ons that most improve your results. You don't need a special machine, a heat press, or a kit that costs more than $30 to make something that looks good.
What glue is best for bedazzling clothes?
For cotton, jersey and most everyday clothing, Gem-Tac — water-based, formulated specifically for rhinestones, dries clear, stays flexible, almost no smell, but rated for hand washing — or E6000 Fabri-Fuse if the piece will live in the washing machine. For clothing that takes real abuse, or for leather, vinyl, denim jackets with hardware, or shoes, switch to E6000, which is stronger but has strong fumes and needs ventilation. B7000 covers hard non-fabric surfaces like tumblers and phone cases. Avoid hot glue on clothing entirely: it feels strong on day one, then goes brittle and pops stones off within a few wears.
How long does bedazzling take to dry?
Depends on the glue. Gem-Tac is touch-dry in about 1 hour and fully cured at 24 hours. E6000 cures at 24 hours with maximum bond strength taking up to 72 hours. Fabri-Fuse dries flat in 8 hours and is machine-washable at 72. B7000 sits in the 24 to 48 hour range. Hotfix stones need no drying at all: 10 to 35 seconds under the applicator wand depending on stone size, 30 seconds to cool, done. Whatever the bottle says, I plan for 72 hours before an item gets worn, washed or stressed. Touch-dry stones feel secure and shear off anyway. Warmth and airflow speed things up; humidity slows water-based glues down by several hours.
Can you wash bedazzled clothes?
Yes, with the right routine. Cure for a full 72 hours before the first wash. Then wash inside out, in cold water, on gentle, inside a mesh laundry bag, with no fabric softener and no bleach. Air dry flat rather than tumble drying, since heat plus agitation is what breaks bonds. A properly cured glued design typically handles dozens of wash cycles before needing touch-ups, and hotfix on denim often lasts longer. Keep a small bag of spare stones with the garment. Replacing three stones takes two minutes and keeps the piece alive for years.
Related Guides
- How to Bedazzle a Graduation Cap — lettering layouts, stone counts and the deadline timeline
- How to Bedazzle a Shirt — the beginner project, with neckline placement maps
- 27 Bedazzle Ideas — every project worth doing, rated by difficulty
- How to Apply Rhinestones to Clothes — glue, hotfix or sew-on, fabric by fabric
- Rhinestone Calculator — how many stones your project needs, by size and coverage