You bought a bag of rhinestones and now you're staring at your apartment wondering what you can bedazzle first. Good news: almost everything. Better news: not everything is worth it, and some things will just fall apart in the wash.
Below are 27 bedazzle ideas grouped by category, each with an honest difficulty rating, a rough stone count, and one tip I'd actually give a friend. This isn't a tutorial page — when an idea deserves a full walkthrough, I link you straight to it. Think of this as the menu, not the recipe.
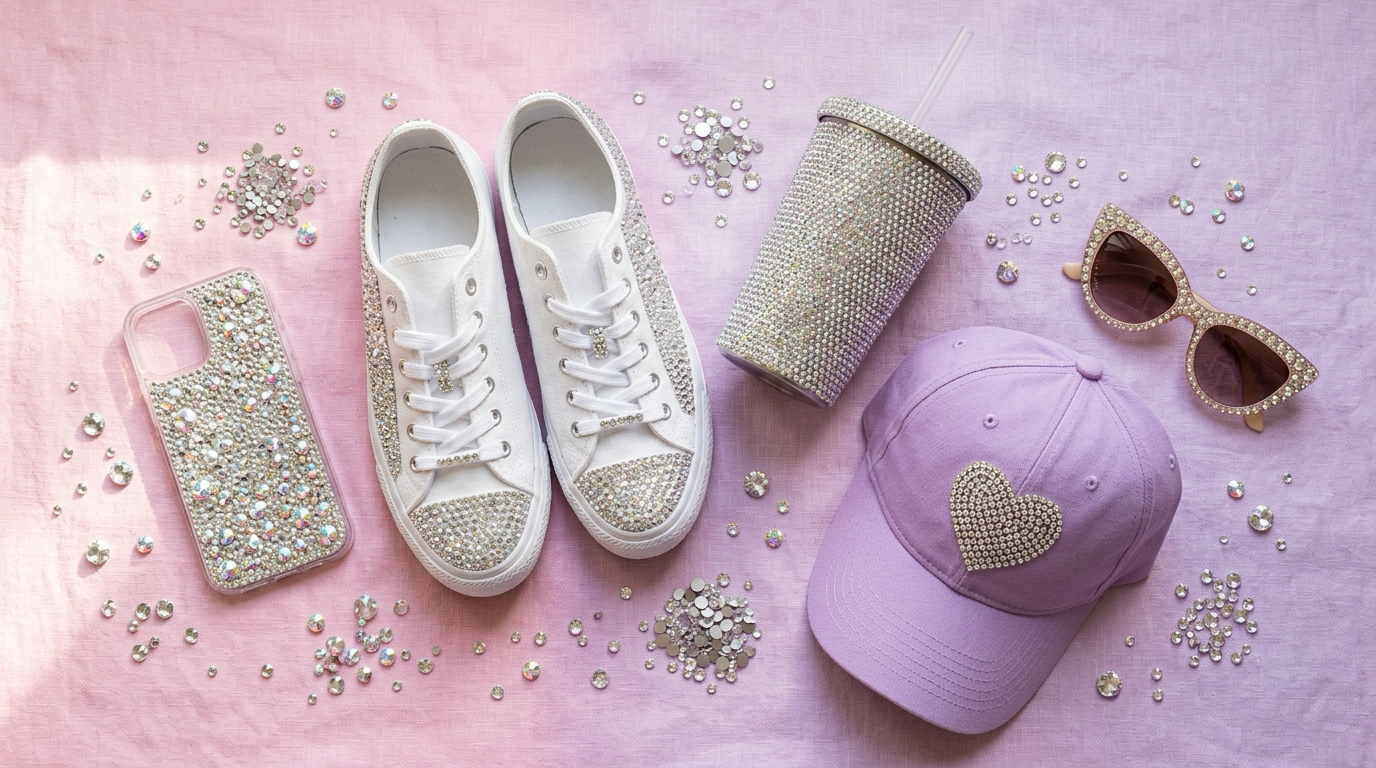
Quick context on why your feed is suddenly 40% crystals: the trend is real and measurable. Grazia reported Pinterest searches up 900% as the gem-sticker trend took over fashion, and Cosmopolitan ran a whole piece arguing that nothing is safe from rhinestones anymore. Cakes included. If you're brand new to the technique itself, read the beginner's guide to bedazzling first, then come back and pick a project.
One note on stone counts: every number below is a ballpark for a design, not full coverage, unless I say otherwise. For anything you plan to cover edge to edge, run it through the rhinestone calculator instead of guessing. Buying 500 stones for a 3,000-stone job is the single most common beginner mistake.
Wearables: The Bedazzling Projects Everyone Starts With
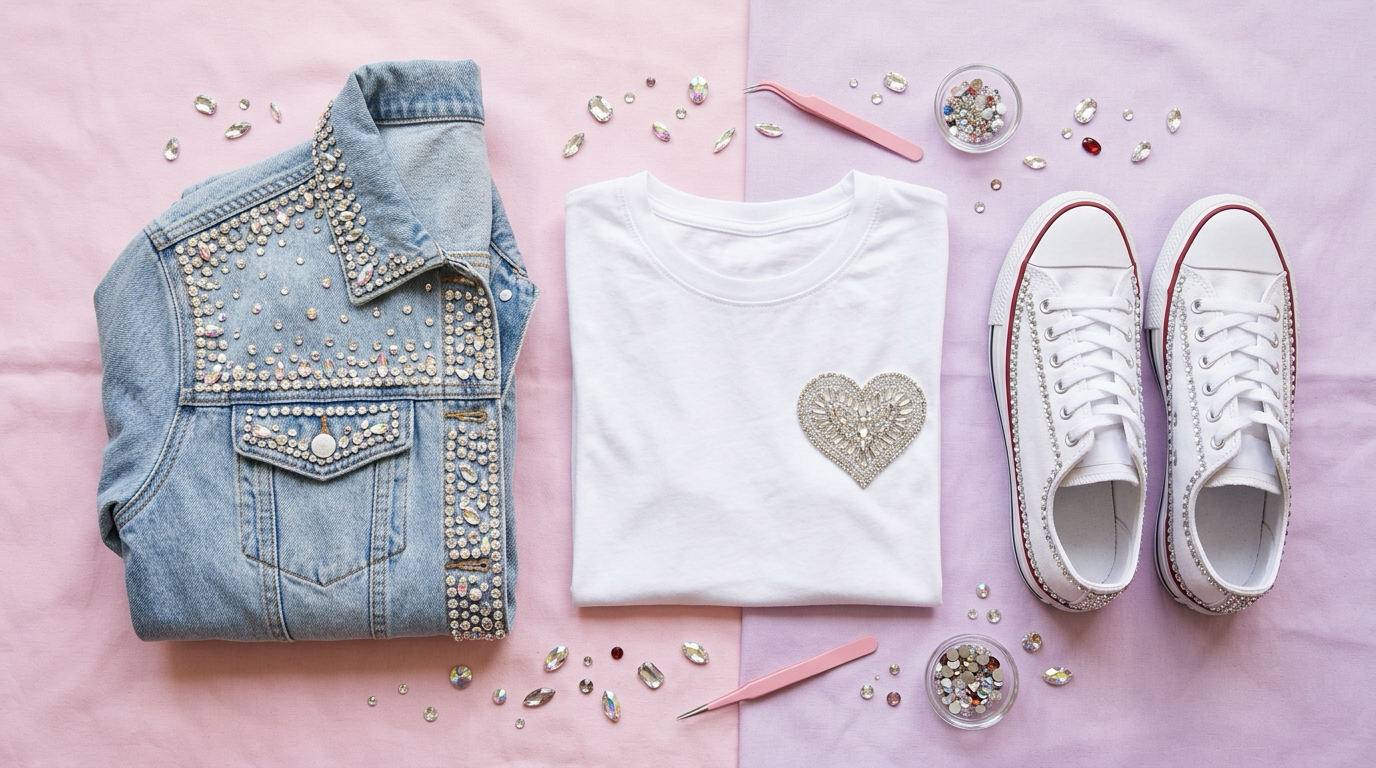
Clothes give you the biggest visual return per hour. They also go through the wash, so glue choice by fabric matters more here than anywhere else on this list.
1. A Plain T-Shirt
The default first project, and for good reason. A cotton tee is flat, forgiving, cheap to replace, and a small chest design reads as intentional rather than costume-y. Start with a heart, a star, or a three-letter word.
Difficulty: Easy · Stones: 150–350 SS10 for a palm-sized design
Tip: Slide a piece of cardboard inside the shirt before you glue. Without it, adhesive soaks through and welds the front to the back. Full walkthrough: bedazzling a shirt.
2. Jean Back Pockets
Two matching pocket outlines is the highest-impact, lowest-effort denim project there is. You're tracing a shape that already exists, so there's no design decision to agonize over, and the sparkle sits exactly where people look.
Difficulty: Easy · Stones: 400–600 SS10 for both pockets
Tip: Stop your outline about 4mm inside the seam. Stones placed on the stitching itself pop off first because the seam flexes twice as much as the flat denim. More on this in the rhinestone jeans guide.
3. A Denim Jacket
The showpiece. Collar points, pocket flaps, and shoulder seams give you natural lines to follow, which means you can look deliberate without drafting anything. It's a weekend project, not an evening one.
Difficulty: Medium · Stones: 800–1,500 SS16 for collar, pockets and shoulders
Tip: Do the collar last. It's the hardest curve, and by then your placement hand is warmed up. See how to bedazzle a denim jacket for the layout map.
4. White Sneakers
Canvas sneakers take rhinestones beautifully and cost almost nothing to sacrifice if it goes sideways. Side panels and heel counters are the easy wins. Toe boxes crease constantly, so leave them bare.
Difficulty: Medium for side accents · Hard for full coverage · Stones: 400–800 SS10 for side accents, 4,000+ for full coverage
Tip: Flex the shoe while the glue is still tacky. Stones that pop off now would have popped off on your first walk anyway. Details in how to bedazzle shoes — and Crocs count too; foam is an even more forgiving surface.
5. A Baseball Cap or Bucket Hat
A rhinestone word across the front panel is one of the fastest ways to get a piece that looks bought. The curved crown is the only real difficulty, and a stiff structured cap solves that for you.
Difficulty: Easy · Stones: 250–450 SS10 for a 5-letter word
Tip: Stuff the crown with a rolled towel so the front panel sits taut and flat while you work. A sagging panel makes your letter spacing drift. Layouts and curve tricks in the hat guide.
6. A Game Day Jersey
Numbers and last names in crystal are a whole subculture, and September through November is peak season. Polyester mesh is the catch — it's slick, it's stretchy, and it has holes.
Difficulty: Medium · Stones: 1,200–2,000 SS16 for a two-digit number plus name
Tip: Outline the existing printed number rather than filling it. Half the stones, twice the legibility from the stands. The polyester-and-heat traps are covered in the jersey guide.
Accessories: Cute Bedazzle Ideas You Can Finish Tonight
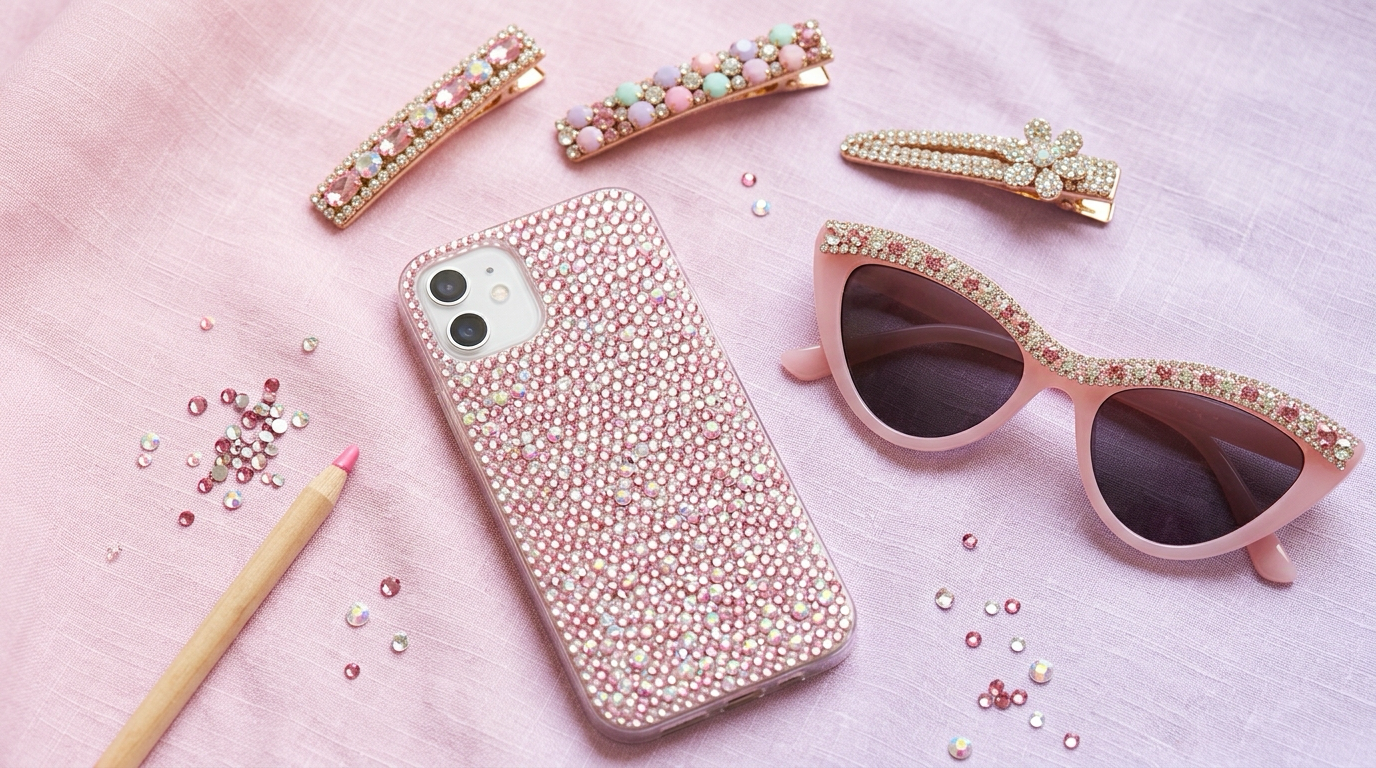
Small, rigid, never washed. This is the easiest category on the entire list and where I send anyone who wants a finished object in one sitting.
7. A Phone Case
The single best beginner project that isn't clothing. Hard plastic, flat surface, no flex, no laundry. Full coverage on a clear case looks genuinely expensive, and you see it 90 times a day.
Difficulty: Easy · Stones: 1,100–1,800 SS10 for full back coverage
Tip: Work in rows from the camera bump outward. Starting at an edge means your last row has to squeeze into whatever gap is left, and it always shows. The full phone case walkthrough covers row order and edge gaps.
8. A Tote Bag or Purse
Canvas totes are basically a giant blank tee with handles. On leather or faux-leather purses, keep it to a monogram or the clasp area — full coverage on a bag you actually carry means constant abrasion.
Difficulty: Easy · Stones: 200–500 SS16 for initials or a small motif
Tip: Bedazzle the side that faces out when the bag hangs on your shoulder. Sounds obvious. People get it wrong constantly. More in the bag guide.
9. Sunglasses
Thirty minutes, huge payoff, and thrift-store frames cost less than lunch. A single line of small stones along the top of each frame is the version that looks styled instead of chaotic.
Difficulty: Easy · Stones: 150–250 SS6 for both frames
Tip: Go one size smaller than you think — small stones hug thin frames. SS6 works; SS16 makes it look like a costume prop. And keep everything well clear of the hinges.
10. Hair Clips and Claw Clips
The perfect leftover-stone project. Each clip takes minutes, and mismatched pastel gems on a set of three looks intentional in a way a single clip never does.
Difficulty: Easy · Stones: 40–80 SS6 per clip
Tip: Rough up glossy plastic clips with a nail file first. Slick acrylic is the one surface where beginners consistently get pop-off, and ten seconds of sanding fixes it.
11. A Keychain or Card Holder
Tiny surface, instant finish, and it survives being thrown in a bag. Great for testing a color combination before you commit it to something big.
Difficulty: Easy · Stones: 100–200 SS10
Tip: Seal the edges with a thin bead of clear glue after everything cures. Keychains live in pockets, and pocket friction attacks stones from the sides.
Drinkware, Desk & Tech: Things to Bedazzle That Aren't Clothes
Hard surfaces, no wash cycle, no flex. Technically easy — the challenge here is patience and curvature, not skill.
12. A Stainless Steel Tumbler
The internet's favorite bedazzling project right now. A full wrap is stunning and genuinely time-consuming; a name or a single band around the middle gets you 70% of the effect for 20% of the stones.
Difficulty: Easy for a band · Hard for a full wrap · Stones: 2,500–3,000 SS16 for a full 20oz wrap
Tip: It becomes hand-wash-only forever. Decide you're fine with that before you start — and a full wrap is exactly the job the calculator exists for. The tumbler method is all about rotation patience.
13. An AirPods or Earbuds Case
The tech accessory nobody thinks of and everyone compliments. Tiny curved surface, so it's a patience test in miniature — but it's finished in under an hour and it rides in your hand all day.
Difficulty: Easy · Stones: 150–300 SS6 for a lid design
Tip: Keep stones clear of the lid seam and the charging port. Open and close the case ten times before the glue cures to confirm nothing binds.
14. A Notebook or Journal Cover
Hardcover journals are flat, rigid, and cheap. An initial in the bottom corner takes twenty minutes and turns a $6 notebook into something you don't leave in a coffee shop.
Difficulty: Easy · Stones: 200–400 SS10 for a large initial
Tip: Stay 1cm off the spine edge. Stones near the hinge get crushed every time the book closes against something in your bag.
15. Pens
The most underrated project on this list. A bedazzled pen is a five-minute win, a great way to burn through odd leftover colors, and the thing every single person picks up off your desk.
Difficulty: Easy · Stones: 300–500 SS6 for a wrapped section
Tip: Wrap the barrel, then roll the pen between two fingers as you work. Trying to place stones on a fixed cylinder from one angle leaves visible seams.
16. A Hand Mirror or Compact
Flat back, rigid, permanently visible in your bag. Vintage-style hand mirrors from the dollar store are the classic practice canvas because you can try a pattern, hate it, and only be out a dollar.
Difficulty: Easy · Stones: 200–400 SS10 for the back
Tip: Tape off the glass before you glue. Adhesive haze on a mirror does not buff out cleanly, ever.
Event Pieces: Bedazzling Projects With a Deadline
These have a date attached, which means planning matters more than usual. Order stones two weeks early. Always.
17. A Graduation Cap
The biggest bedazzle project of the year and, done well, the one that ends up in every photo. A 9.5-inch square gives you a lot of room for a name, a year, and a design.
Difficulty: Medium · Stones: 3,000–3,500 SS16 for full coverage (1,800–2,500 in SS20), 300–1,000 for lettering or a quote
Tip: Check your school's decoration rules before you glue a single stone. Then read how to bedazzle a graduation cap — the layout and the center button need planning.
18. A Party Clutch
Full-coverage clutches retail for triple digits. A thrifted $8 hard-shell clutch plus a few thousand stones gets you shockingly close, and hard-shell means no flex issues at all.
Difficulty: Medium · Hard for full coverage · Stones: 2,000–3,000 SS10 for full coverage
Tip: Do the front panel only. The back rubs against your hip all night and the difference is invisible in photos.
19. A Halloween Costume Piece
Costumes are the one place where "too much" doesn't exist. Crowns, masks, boot cuffs, cat ears — everything is fair game, and nobody's inspecting your placement under stage lights.
Difficulty: Easy · Stones: 200–600 SS16, or whatever's left in the tray
Tip: For a costume, glue can be fast-set rather than durable — you need one night, not one year. Or skip glue entirely with hotfix stones: instant set, zero cure wait.
20. A Bachelorette Sash or Veil
Names, dates, and tiny hearts on tulle or satin. Low stone count, high photo count, and a genuinely thoughtful gift if you're making one for someone else.
Difficulty: Easy · Stones: 100–250 SS10
Tip: Tulle is see-through, so glue dots show. Use the smallest possible amount and place stones along the existing hem where the fabric is doubled.
Home & Weird-But-Cute: What Can You Bedazzle Around the House?
This is where the internet gets creative. Ask any craft forum what to bedazzle and within three comments someone suggests an appliance. They're not entirely joking — a whole Pinterest trend feed dedicated to bedazzled everything is full of household objects nobody expected to sparkle.
21. A Light Switch Plate
My favorite chaotic-good project. It costs two dollars, takes half an hour, and produces a genuine double-take from everyone who walks into the room and turns on a light.
Difficulty: Easy · Stones: 300–500 SS16 for full coverage
Tip: Unscrew the plate and work on it flat on a table. Stoning it while it's still on the wall means gravity fights you the entire time.
22. A Picture Frame
A rhinestone border around a 4x6 frame is the entry-level version of bling home decor, and it's the project most likely to survive your taste changing in six months.
Difficulty: Easy · Stones: 250–500 SS10 for a border
Tip: Use one stone size for the whole border. Mixed sizes look great on organic designs and look like a mistake on a straight line.
23. A Vase or Candle Jar
Glass and crystal were made for each other. A band of stones around the base of a clear vase catches light from below and looks far more expensive than the vase was.
Difficulty: Easy · Stones: 800–1,500 SS10 for a 5cm band
Tip: Real candle jars get warm. Keep stones on the lower third only, and skip this one entirely for candles you actually burn down to the bottom.
24. Your Roomba
Yes, really. This is the answer that shows up in every "what should I bedazzle" thread online, and it's funnier than it has any right to be. A disco vacuum genuinely improves a home.
Difficulty: Easy · Stones: 150–250 SS10 for a monogram on the lid
Tip: Top surface only. Anything near the bumper, the sensors, or the charging contacts will either be scraped off within a week or break your robot. Start with a monogram, not full coverage.
25. A Pet Collar Charm
Note the wording: a charm or a tag, hanging off the collar. Not the collar band itself, and never anything your pet can reach with their mouth.
Difficulty: Easy · Stones: 40–80 SS6
Tip: Seal it with a clear topcoat and check it weekly. If a single stone lifts, the whole charm comes off the collar that day. Loose rhinestones and animals are a genuinely bad combination.
26. Christmas Ornaments
Plain matte baubles turn into heirloom-looking ornaments with surprisingly few stones, and they store flat in a box for eleven months instead of cluttering your life.
Difficulty: Easy · Stones: 300–500 SS6 per ball
Tip: Spiral outward from the top hook rather than working in horizontal rings. Rings on a sphere always end up crooked, and there's no way to hide it.
27. A Wall Mirror Frame
The big-swing home project. A full rhinestone border on a round wall mirror is the kind of thing that anchors an entire room, and it's a satisfying use for a few thousand leftover stones.
Difficulty: Medium · Stones: 2,000–4,000 SS16 depending on frame width
Tip: Lay the mirror flat and work in quarters, letting each quarter cure before rotating. Vertical gluing on a large frame produces glue drips you'll see forever.
Where to Start If You've Never Done This
If you're picking your first project off this list, ignore the ones that look most impressive and pick one that meets three conditions: flat, rigid or forgiving, and cheap enough that a bad result doesn't sting.
That means a phone case, a plain t-shirt, or a hand mirror. Nothing else.
Here's the order I'd actually suggest:
- A phone case or hand mirror — hard, flat, no glue-through risk, no laundry. You learn spacing and glue control with zero stakes.
- A t-shirt — your first fabric project, which is a different skill entirely. Cardboard inside, fabric-safe glue, 72-hour cure. Start with the shirt tutorial, because fabric is where people who skipped the instructions lose their stones in the first wash.
- Jean pockets or sneakers — now you're dealing with flex and abrasion, the two things that kill rhinestone work.
- A tumbler or a graduation cap — big stone counts, curved surfaces, real time investment. Worth doing once you trust your own placement.
Skip full-coverage anything until project four or five. A 3,000-stone tumbler as a first attempt is how people decide they hate this hobby. Do a 200-stone mirror instead and finish it in an evening.
Two more things before you buy supplies. First, order more stones than you think you need — 20% more, minimum, because stones bounce, roll under furniture, and disappear into carpet at a rate that defies physics. Second, run your project through the stone count calculator if it involves any real coverage, so you buy once instead of three times.
FAQ
What is the easiest thing to bedazzle?
A phone case. It's flat, it's rigid, it never goes in the washing machine, and it doesn't flex, which removes most of the ways beginner projects fail. A hand mirror or a hair clip is just as safe. The hardest first projects are anything stretchy, anything that creases, and anything with a tight curve — so leggings, shoe toe boxes, and the hinge area on curved sunglasses are all worth saving for later.
What things should you not bedazzle?
Anything that goes in a washing machine on a regular cycle, unless you're committed to hand washing or a cold gentle cycle inside a mesh bag. Anything dishwasher or microwave bound — heat destroys both glue and coated stones. Anything safety-related: seatbelts, helmets, car exteriors, phone camera lenses, or any surface a driver needs to see through. Skip pet collar bands, kids' toys for under-threes, and anything a small human or animal could chew a loose stone off. Also avoid high-stretch performance pieces — swimwear and compression activewear; rigid stones pop off the moment that fabric does its job.
What do I need to start bedazzling?
Four things. Flatback rhinestones in a couple of sizes (SS6, SS10 and SS16 cover most projects). A fabric-safe or multi-surface adhesive. A wax pick-up pencil, which is a $3 tool that will save you an hour on your first project versus tweezers. And a piece of cardboard for anything fabric. That's it — no machine required. The full setup and glue comparison lives in the how-to-bedazzle guide.
How many rhinestones do I need for my project?
It depends entirely on surface area, stone size, and whether you're doing full coverage or a design. Rough anchors: a palm-sized shirt design runs 150–350 SS10, a full phone case around 1,500, a graduation cap 3,000–3,500 SS16, a 20oz tumbler 2,500–3,000 SS16. For anything specific, the rhinestone calculator does the math per object and stone size, then adds a buffer for the ones you'll lose to the floor.
Related Guides
- How to Bedazzle: The Complete Beginner's Guide — glue types, stone sizes, technique
- How to Apply Rhinestones to Clothes — glue, hotfix or sew-on, by fabric
- How to Bedazzle a Shirt — the best first fabric project
- How to Bedazzle a Graduation Cap — the deadline project
- Rhinestone Calculator — stone counts per object and size