If your first rhinestone project is going in the laundry, start here. A plain tee is the cheapest canvas in craft: $6, flat, forgiving, and nobody cries if you mess it up. That's why I tell everyone learning how to bedazzle a shirt to burn their first 300 stones on a $6 blank tee before they touch anything precious.
But a shirt has one problem a grad cap does not. You are going to wash it. Thirty times, maybe fifty. This guide isn't just "put glue, put stone." It's how to build a diy bedazzled shirt that still sparkles after a year in your laundry rotation.
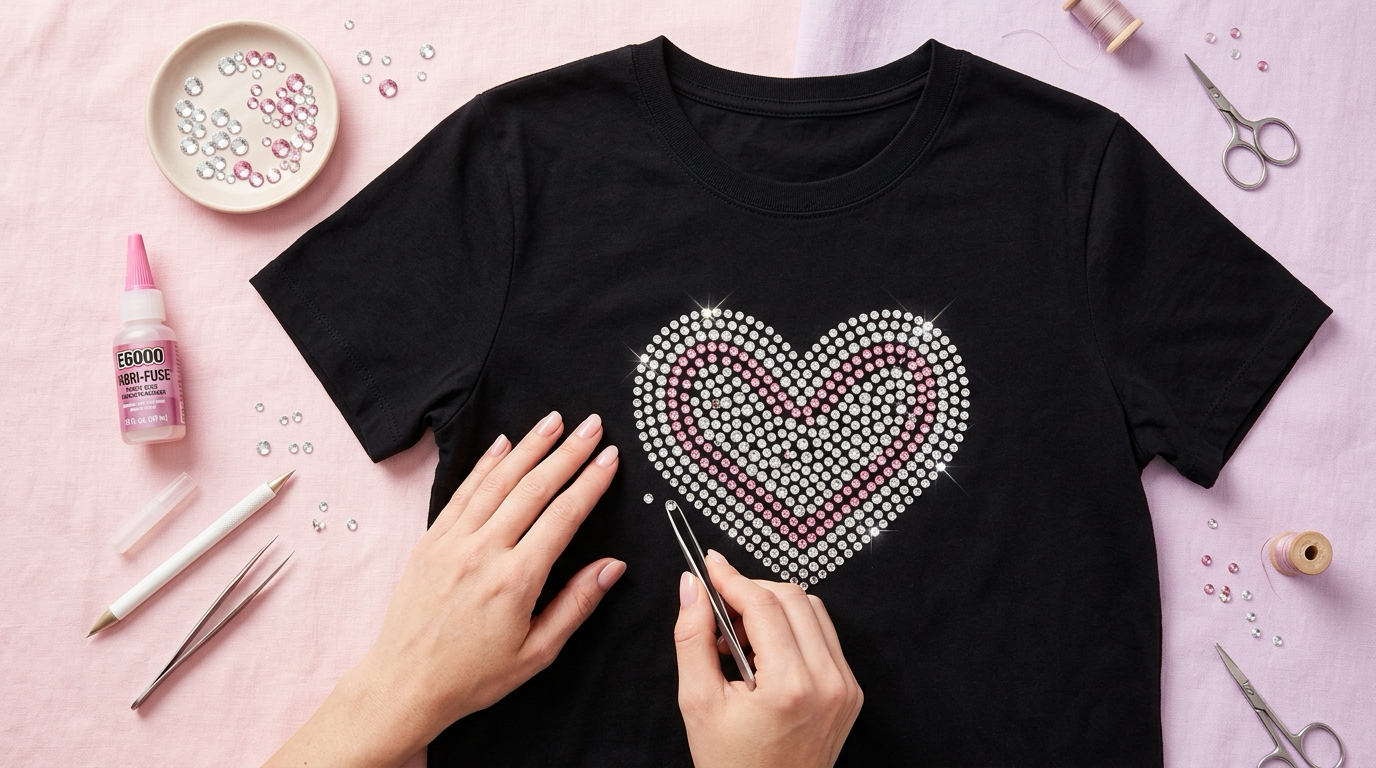
Why a T-Shirt Is the Best First Project
Three reasons. It's flat, so gravity works with you instead of against you. It's cheap, so a wobbly first row costs you nothing. And the surface is big enough that you can practice spacing without squinting.
The catch is stretch. A tee is knit, not woven. Pull it while you glue and it snaps back afterward, dragging your stones into a crooked line. Everything in this guide is built around that one fact.
If you want the wider picture first, the complete beginner's bedazzling guide covers stones, glues, and tools across every project type. Come back here for the shirt-specific parts.
Picking the Right Shirt
Not every tee takes rhinestones well. Here is what actually matters.
Go 100% cotton if you can. Cotton jersey has a slightly fuzzy surface that glue grips beautifully. A mid-weight tee — roughly 5 to 6 oz — is the sweet spot. Heavy enough to hold a design, soft enough to still wear.
Blends are fine, with caveats. A 60/40 cotton-poly holds stones well. Once you add spandex (anything labeled 5% elastane or "stretch fit"), the fabric moves a lot more, and stones near the bust or waist will pop first. Not a dealbreaker, just place your design where the shirt flexes least.
Skip performance fabrics. Moisture-wicking athletic poly usually has a slick finish. Glue beads up on it instead of soaking in. Same story for silky rayon, which is too thin and shows glue through the front.
Dark colors make stones pop. This is the single biggest upgrade you can make to a rhinestone shirt diy, and it costs nothing. Clear crystal on black reads as pure light. On white, the same stone half disappears. My default combo is a black tee with clear AB stones — maximum contrast, and the AB coating throws pink and blue in the light.
If you want color, jewel tones win: burgundy, forest, navy. Pastels are the hardest to make sparkle.
Buy the tee you actually want to wear, in your real size. And check whether it's pre-shrunk. If it's not, expect it to shrink after washing, which drags a rigid rhinestone design out of shape.
What You Need
- A washed, dried shirt (yes, before you start — more on this below)
- Flatback rhinestones, SS10 to SS16 for most shirt designs. Buy 20% more than you think.
- Fabric-flexible glue. For a tee that will live in the washing machine, use E6000 Fabri-Fuse. Beacon only rates Gem-Tac for hand washing, so save Gem-Tac for hand-washed or rarely-washed pieces. Both stay bendy after curing, which is exactly what rhinestones on a knit tee need.
- A piece of cardboard cut slightly wider than your design area
- Fine-tip tweezers or a wax picker pencil
- A toothpick or fine applicator tip for placing glue dots
- Tailor's chalk or a water-soluble fabric marker
- A printed template if you are doing letters or a logo
- Paper towels and a pin for lifting misplaced stones — never wipe wet glue; it spreads into a film that dries cloudy
That's genuinely it. No machine, no heat press, no special press for a first project.
Where to Put the Stones (and How Many)
Placement decides whether your shirt looks intentional or accidental. Five zones work, and each has a rough stone budget — figure 250 to 300 stones per hour of placement.
Chest design (the classic). A word, a heart, a small graphic centered 3 inches below the collar. Budget 300 to 600 stones in SS10 to SS16 for a design 5 to 7 inches wide. This is where most people start and it's the right call.
Collar and neckline. A stone outline following the neckband, or a graduated cluster fading down toward the chest. 120 to 250 stones, and go smaller — SS6 to SS10 — because the neckband is ribbed and big stones sit awkwardly on ribs.
Sleeves and shoulders. Cuff bands or a shoulder scatter. 80 to 200 stones per side. Keep them off the underarm entirely; that area folds hard every time you move.
Back or yoke. The biggest canvas and the biggest budget: 400 to 900 stones depending on how solid you go. Great for a name, a number, or a full graphic.
Scattered gradient. Dense at one shoulder, thinning out across the chest. 150 to 300 stones and it looks far more expensive than it is.
One rule across all of them: avoid side seams, underarms, and anywhere the fabric creases when you sit. Stones don't bend. Fabric that folds sharply will pry them off.
Wondering how many rhinestones you need for your design? The calculator works out coverage from your dimensions and stone size so you order once instead of three times.
How to Put Rhinestones on a Shirt: Step-by-Step
Six steps, and the first one happens in the washing machine, not at the craft table.
Step 1: Wash the shirt first — no fabric softener
Brand new tees come coated in sizing, a manufacturing finish that glue hates. Wash the shirt on warm, dry it fully, and don't use fabric softener or dryer sheets.
Softener works by leaving a thin waxy film on fibers. That film is the enemy of adhesion. It's the number one reason a first project sheds stones after two weeks, and almost nobody warns you about it. If you already washed it with softener, run it again with a plain detergent and no additives.
Let it dry completely. Any residual damp under a stone will keep the glue from curing properly.
Step 2: Slide cardboard inside
Cut a piece of cardboard a couple inches wider than your design and slide it inside the shirt, under the front panel.
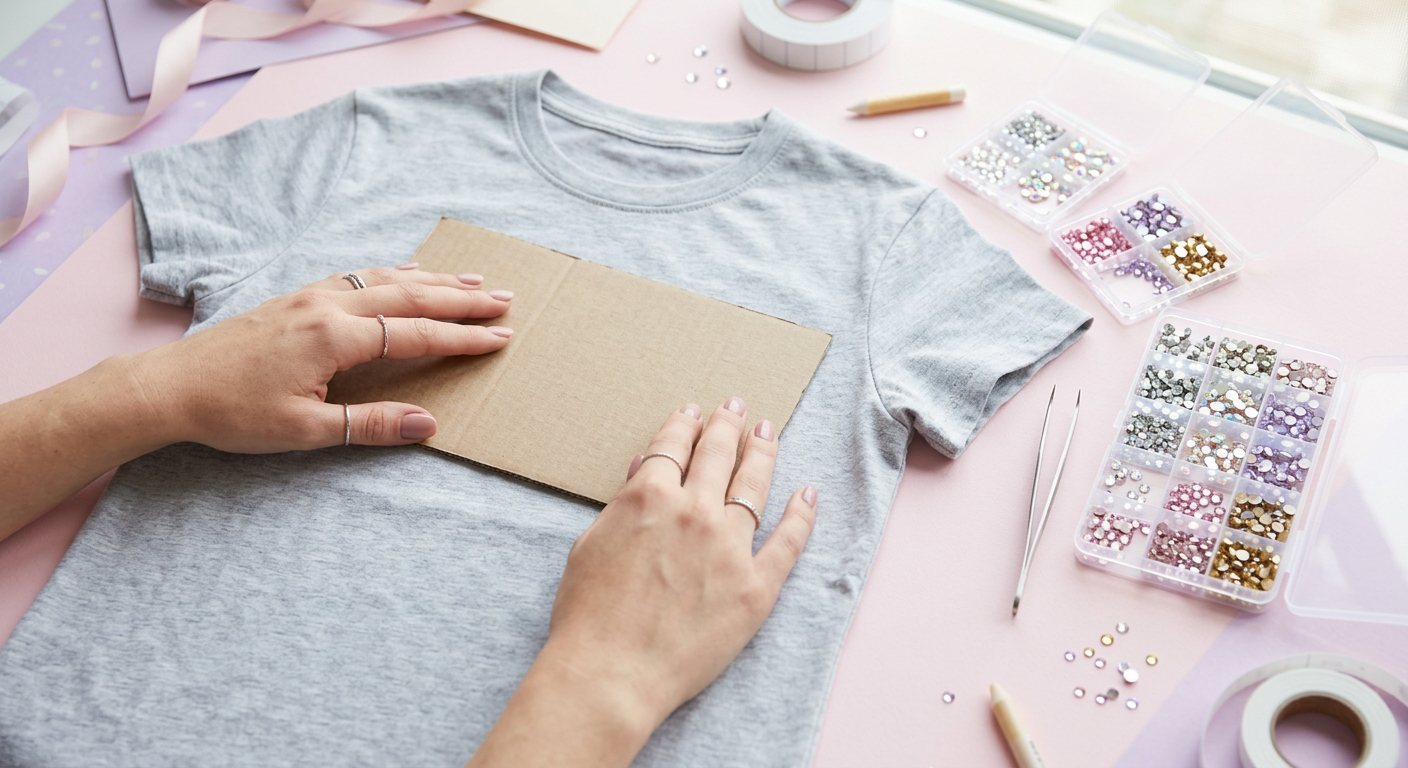
This does two jobs. It stops glue from soaking through and bonding the front of your shirt to the back — which is exactly as bad as it sounds. And it gives you a flat, stable surface so the knit can't stretch under your hand.
Smooth the fabric over the cardboard until it lies flat. Flat, not stretched. If you can see the knit gaping or the fabric looks tight, ease off. You want the shirt at its natural resting size.
Step 3: Transfer your design
Three methods, pick by design type.
Chalk outline. Tailor's chalk, drawn freehand or traced around a paper cutout you pin down. Brushes off after. Best for hearts, stars, and simple shapes.
Printable template. Print your design at actual size, slide it between the shirt and the cardboard, and trace through if the fabric is thin — or lay it on top and mark key anchor points. This is how you get letters that are actually straight. Measure twice: mark the center line of the shirt with chalk first, then align your template to it.
Freehand dots. For scattered or gradient looks, just mark stone positions as small chalk dots. Vary the spacing deliberately — perfectly even scatter reads as a mistake.
Whatever you use, step back and look at it from six feet away before a single drop of glue comes out. Chalk is free. Regret is not.
Step 4: Dot the glue, never smear it
This is the technique that makes or breaks a shirt.
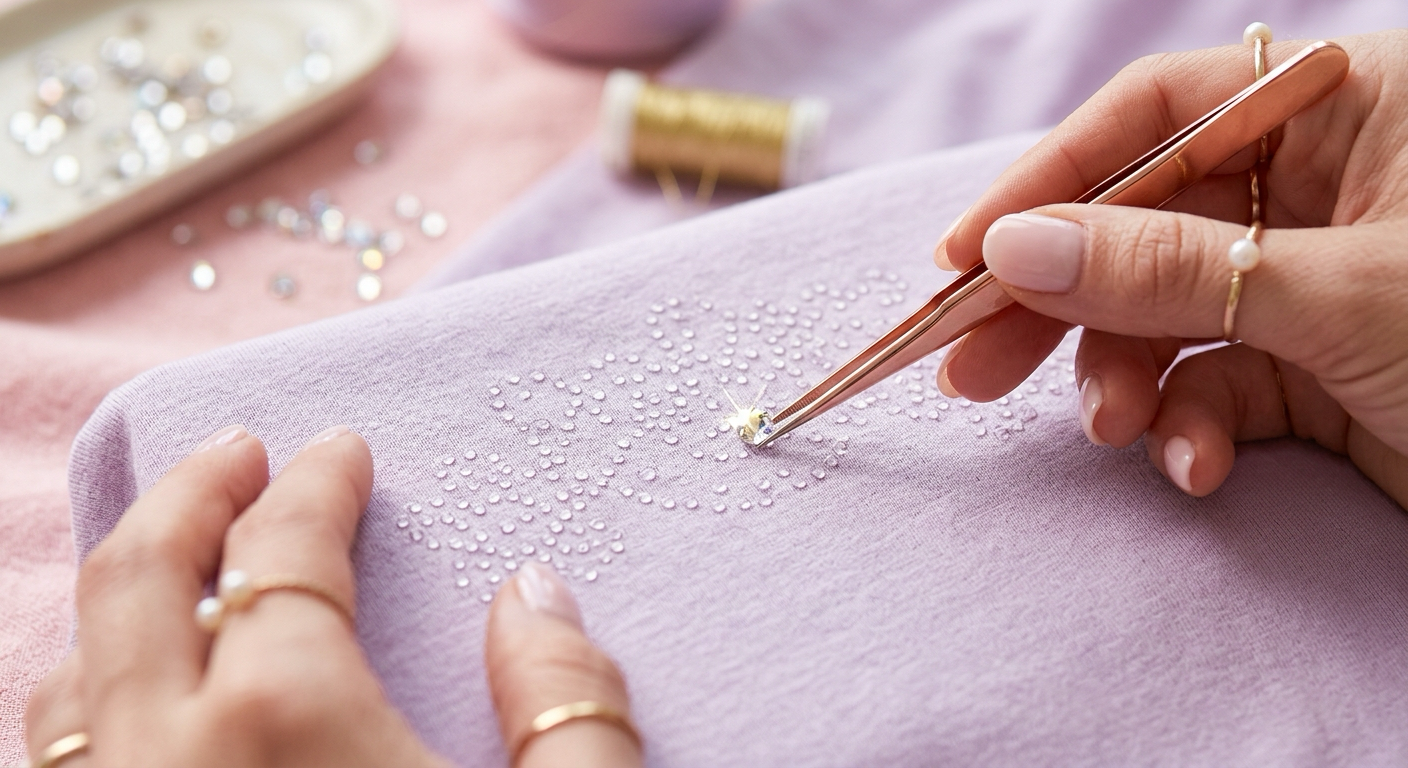
Squeeze out a dot about two-thirds the width of the stone. Smaller than feels right. On dark fabric, glue that spreads past the edge of the stone dries into a visible pale halo, and once it's dry it won't come out.
Then place the stone straight down with tweezers and press for two seconds. Straight down, no sliding — sliding smears glue outward and creates that same halo.
On knit fabric specifically, resist the urge to press hard. Hard pressure pushes glue through the weave, where it does nothing for the bond and stiffens the fabric on the inside. Firm, brief contact is enough.
That's the shirt version. The fabric-by-fabric breakdown covers glue choice and technique for denim, polyester and everything else.
Step 5: Work in small sections
Glue eight to ten dots, place those stones, then glue the next batch. Fabric adhesive skins over in a few minutes, and a skinned dot won't grab.
Work in roughly 2-inch sections and always move outward from the center of the design. If you are doing lettering, complete one letter at a time rather than laying all the glue for a word.
Check your alignment every couple of rows by looking straight down from above. Eyeballing from an angle is how rows drift.
Step 6: Cure it — 24 to 72 hours, flat and untouched
The shirt stays flat on the cardboard, face up, in a dry room. Don't hang it. Don't fold it. Don't try it on.
Cure times come straight from the manufacturers. Beacon lists Gem-Tac at 1 hour dry time and 24 hours to cure, and notes it is formulated for flatback stones rather than hotfix. E6000 Fabri-Fuse says to dry flat at least 8 hours and treats the piece as washable after 72 hours, with enough stretch and recovery that the fabric stays flexible after washing.
So on Fabri-Fuse: dry flat for the first 8 hours, wearable after 24, washable after 72. (Gem-Tac pieces: dry in 1 hour, cured at 24 — but remember they're hand-wash.) I give every shirt a full week before its first wash, because that first wash is the one that tells you whether the design lives or dies.
Can You Wash a Bedazzled Shirt? Making It Survive the Laundry
Most guides on how to bedazzle a shirt stop at the last stone. This is the half that decides whether the design is there in a year. A grad cap gets worn once. A shirt gets washed thirty times. Here is my routine — for machine-rated Fabri-Fuse work; a Gem-Tac piece gets hand washed instead.
Wait a full week before wash one. Cure specs are minimums measured in lab conditions. A week costs you nothing.
Turn it inside out, cold water, gentle cycle. Every time. The stones ride against the shirt instead of the drum, and cold-and-slow spares the adhesive. The full logic behind each rule lives in the aftercare section of the technique guide.
Liquid detergent, no softener, no bleach. Softener is as bad after gluing as before — it builds up around stone edges and works the bond loose. Powder scours; liquid doesn't.
Wash it with soft things only, inside a mesh bag. No towels, no denim. The bag costs a couple of dollars and cuts the abrasion dramatically.
Never the dryer, never an iron over the stones. Air dry flat or hang inside out. Professional garment care guidance says the same for any embellished piece — The Laundress recommends hand washing embellished items in cool water and laying them flat to dry, and explicitly warns against the dryer. If the shirt needs pressing, iron the back.
Realistic expectations: with this routine you will lose the odd edge stone over time — call it 1% of the design, a small handful on a 400-stone motif. That's normal, not failure. Keep 20 spare stones and a drop of glue in a labeled bag: scrape the old glue spot flat, dot fresh glue, set the stone, and give it a full cure before the next wash.
Common Mistakes to Avoid
Fabric softener before gluing. The film it leaves blocks adhesion completely. Wash with plain detergent only.
Stretching the fabric while you glue. The knit snaps back and pulls your straight line into a curve. Smooth it over the cardboard, don't pull it taut.
Glue dots bigger than the stone. They bleed out and dry as a pale halo, permanently visible on dark shirts. Under-dose rather than over-dose.
Wearing it the same day. Twenty-four hours minimum before it goes on a body. Every stone you touch before that is a stone that shifts.
Placing stones in flex zones. Underarms, side seams, and the deepest fold under the bust. Rigid stones and hard creases don't coexist for long.
Reaching for the hot glue gun. It dries brittle, and brittle plus stretchy knit equals stones on the floor. Full explanation in the FAQ.
That's how to bedazzle a shirt properly: wash first, dot small, press briefly, cure a week, then wash cold and inside out forever. Do those five things and 400 stones outlast the shirt.
FAQ
What kind of rhinestones stay on shirts best?
Flatback (non-hotfix) glass rhinestones in SS10 to SS16, applied with a flexible fabric adhesive. Glass outperforms acrylic on shirts for two reasons: its flat back is more consistent so the glue bond is cleaner, and it doesn't cloud or scratch in the wash the way acrylic eventually does.
Hotfix stones work too, but they need an iron or heat press and they're less forgiving on thin knit. For a first project, flatback plus glue is the more controllable route. Size matters as much as type — anything above SS20 on a t-shirt gets heavy, and weight is leverage that works against your glue every time the fabric moves.
How do you wash a bedazzled shirt?
Inside out, cold water, gentle cycle, mesh bag, liquid detergent — no softener, no bleach, never the dryer, and wait a week after gluing before the first wash. Done this way, a shirt glued with a machine-rated adhesive like Fabri-Fuse survives dozens of washes with only minor touch-ups; Gem-Tac pieces should be hand washed instead.
Can you bedazzle a shirt with hot glue?
No, and this is worth explaining because hot glue is what everyone has in the drawer.
Hot glue cures hard and brittle. Shirt fabric is knit, meaning it stretches in every direction constantly — every time you move, breathe, or pull it over your head. A brittle bond on a stretching surface cracks, and once it cracks the stone falls. Hot glue also softens at temperatures a dryer easily reaches, so the design can literally loosen off the shirt.
It also looks wrong. Hot glue leaves visible stringy webbing and a thick bump under each stone that sits proud of the fabric. Fabric-specific adhesives are formulated to stay flexible after curing, which is the entire point. A 2 oz bottle costs a few dollars and lasts thousands of stones.
How many rhinestones do I need for a shirt design?
For a standard chest design 5 to 7 inches wide, budget 300 to 600 stones in SS10 to SS16. A neckline outline runs 120 to 250. A sleeve accent is 80 to 200 per side. A full back design can hit 900.
Those are starting numbers, and coverage varies a lot with density and stone size — going from SS10 to SS16 roughly halves the count for the same area. Plug your actual dimensions into the stone count calculator for a real number, then order 20% extra. You will drop some, some will land crooked, and you want spares for wash touch-ups later.
Related Guides
- How to Bedazzle: The Complete Beginner's Guide — start here for stones, glues, and tools
- How to Apply Rhinestones to Clothes — the technique guide across fabric types
- How to Bedazzle a Graduation Cap — the deadline project, step by step
- 27 Bedazzle Ideas — what to sparkle after this one
- Rhinestone Calculator — work out how many stones your design needs