Your ceremony has a date. That date is not moving. That is the whole reason a grad cap is different from every other rhinestone project I do — there is no "I'll finish it next weekend."
This is a deadline guide as much as a craft guide. I'll walk you through how to bedazzle a graduation cap — the full DIY job on a flat 9.5-inch square with a raised button dead in the middle — how many stones each layout takes, and when to start so the glue is fully cured before you walk. New to rhinestones entirely? Skim my beginner bedazzling guide first, then come back. This page assumes you have a cap, a deadline, and mild panic.
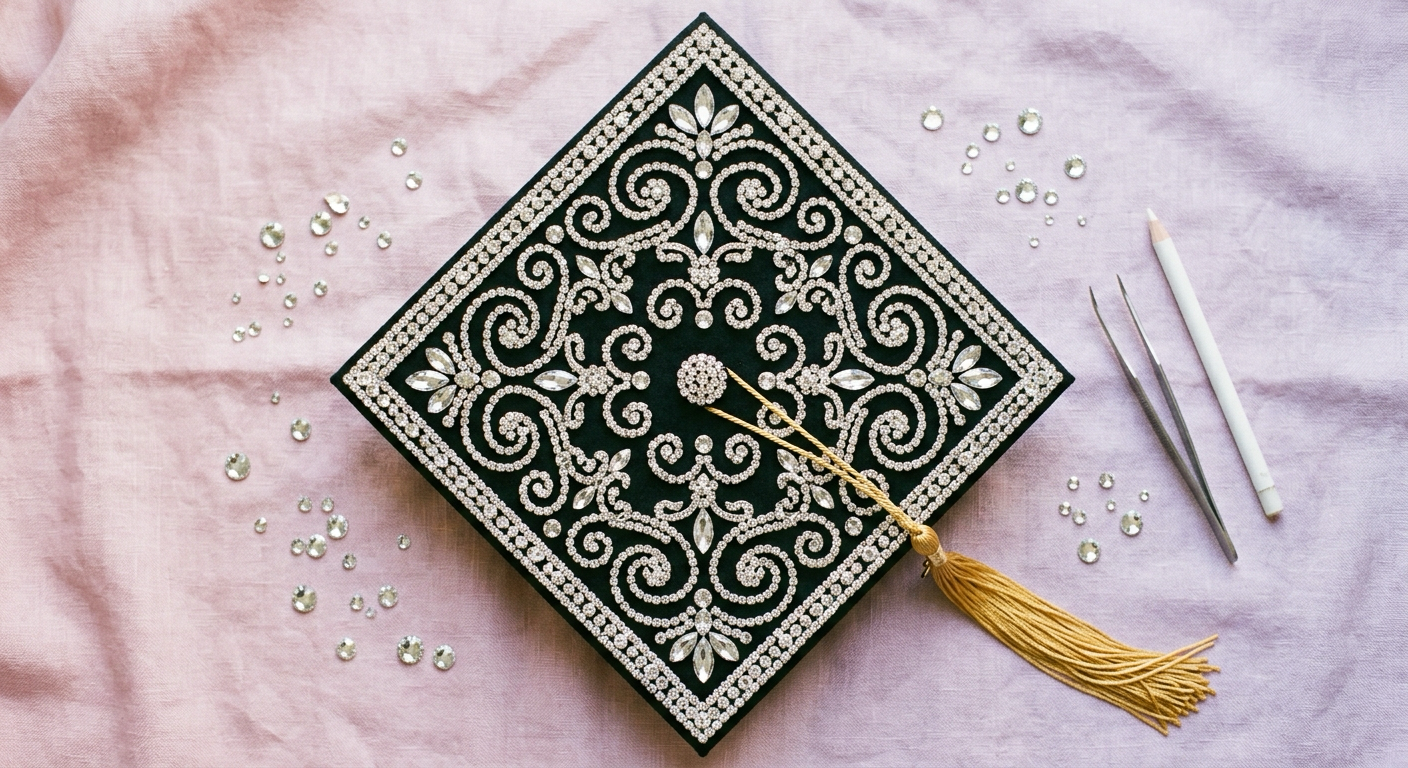
What Makes a Graduation Cap Different?
A mortarboard is not a t-shirt. Three things make it its own beast.
It's a hard flat square, roughly 9.5 x 9.5 inches. That's just over 90 square inches of top surface. Nice and predictable — but it also means every crooked line is obvious. On a shirt, fabric drape hides your wobbles. Here, nothing hides.
There's a button in the middle. The tassel loops over it, and on most caps that button is a raised plastic or metal disc about 0.5 to 0.75 inches across, sitting exactly at center. You cannot glue over it. You cannot glue around it so tightly that the tassel can't swing. Every good design either works the button into the composition or keeps a clear ring around it — an inch is enough for the tassel to swing, 1.5 if you want real margin.
Underneath the fabric is a stiff board. It's usually fiberboard or heavy card wrapped in polyester. That matters enormously: heat and pressure warp it. So iron-on hotfix stones and a mortarboard are a bad pairing. Glue-on flatbacks only. (Beacon makes a related point on their Gem-Tac product page — hotfix stones are pre-coated for heat activation and don't bond well with glue anyway, so pick one system and stick to it.)
One thing to do before anything else: check your school's rules. Plenty of universities publish an actual policy, and they're stricter than people expect — Kansas State's cap decoration guidelines are typical, requiring that only the flat top be decorated, that everything lies flat, and that nothing extends past the border of the cap. Rhinestones pass all three of those easily, which is exactly why they're the safest way to decorate. Three-inch foam letters are not.
Bedazzled Graduation Cap Ideas (With Real Stone Counts)
Here's the part nobody tells you about how to bedazzle a graduation cap: your design choice decides your timeline. A border takes one evening. Full coverage takes three. Pick with your calendar open.
Hands-on times below include the fiddly parts — glue batches, chalk checks, corrections — not just raw placing speed.
| Design | Stones needed | Sizes | Hands-on time |
|---|---|---|---|
| Year only, outline ("2027") | 280–340 | SS10 | 1.5–2 hrs |
| Year, outlined + filled | 500–650 | SS10 + SS16 | 3–4 hrs |
| Name or one word (6–8 letters) | 380–520 | SS10 outline | 2.5–3 hrs |
| Two-line quote | 700–1,000 | SS10 + SS16 | 4–6 hrs |
| Single-row border | 230–260 | SS16 | 1–1.5 hrs |
| Double-row border | 460–520 | SS16 | 2–3 hrs |
| Ombré corner fade | 900–1,300 | SS16 + SS20 | 5–7 hrs |
| Full coverage | 1,800–2,500 | SS20 | 9–12 hrs |
Letters and names. The classic. Your name, your major, "SHE DID IT." Keep it to one or two words if you're outlining only — outlined letters read beautifully in photos and use a third of the stones a solid fill needs.
The year. "2027" in block digits, shifted so the button hides inside the zero. This is my favorite layout because it solves the button problem instead of fighting it. Four digits at about 2.5 inches tall each will span roughly 7 inches, which fits with a comfortable margin on both sides.
Quotes. Two lines max, split above and below the button. "Not done yet." "Thanks, Mom." Script fonts look gorgeous but are brutal to outline — every curve needs stones placed one at a time on a curve you drew freehand. Block or serif fonts are far more forgiving for a first rhinestone graduation cap.
Borders. A single row of SS16 around the perimeter is about 240 stones and takes about an hour. It's the highest-impact-per-hour thing on this list. Do a border alone if you're short on time, or use it to frame lettering.
Ombré fills. Clear at one corner fading through blush into fuchsia at the opposite corner. Beautiful, but you're placing 900 to 1,300 stones and mixing three colors in transition zones. Only start this five days out.
Full coverage. Call it 80 usable square inches once you stay clear of the button. In SS20 you're looking at 1,800–2,500 stones; if you fill in SS16 instead, that number jumps past 3,000 because the smaller stones pack tighter. Stunning under stadium lights. Not a Thursday-night project.
Not sure how many rhinestones you need for your layout? The calculator runs your cap size and stone size with the 20% buffer built in.
What You Need
- A graduation cap. Ideally a spare — see the FAQ on rented caps.
- Flatback rhinestones. SS16 is my default workhorse. SS10 for letter outlines and tight curves, SS20 for large fills. Skip SS6 and SS8 entirely; they vanish in photos.
- Glue. Gem-Tac or E6000. Both bond to polyester cap fabric.
- A wax pick-up pencil. Non-negotiable. Fingers drop stones, tweezers flick them across the room, wax picks them up every time.
- Fine-tip tweezers for nudging stones once they're placed.
- White chalk pencil or tailor's chalk for marking the black fabric.
- Printer paper, scissors, ruler, pencil for the template.
- Toothpicks for pushing glue blobs around and lifting stray stones.
- A shallow tray or plate to pour stones into.
Skip the plastic setting tools sold in craft kits. On a flat rigid board, a wax pencil and tweezers are faster and more precise.
How to Bedazzle a Grad Cap, Step by Step
The whole of how to bedazzle a graduation cap is seven steps, and the first three happen before you open the glue.
Step 1: Measure and mark the button
Lay the cap flat, top up, tassel removed. Measure the sides — most are 9.5 inches, but some run 9 or 10. Write your number down. Then measure the button: note its diameter and confirm it's centered (it usually is, within a hair).
Draw a light chalk circle about an inch out from the button's edge. That's your no-glue zone. The tassel needs room to hang and to swing from right to left during the turning ceremony. Stones crowding the button will get snagged and popped off by the tassel cord, which is a miserable way to lose a stone mid-ceremony.
Step 2: Sketch on paper first
Cut a square of paper to the exact dimensions you measured. Mark the button position on it. Now sketch your design on the paper, at full size, in pencil.

Do this even if you think you don't need to. Full-size sketching is where you discover your quote is two inches too wide, or that your name has nine letters and won't fit. Redraw as many times as it takes. Paper is free, and a crooked "2027" glued to a cap is not fixable.
When you're happy, hold the paper at arm's length. Then prop it across the room. If the lettering stops reading at ten feet, it will not read in a photo taken from the twentieth row.
Step 3: Transfer the layout to the cap
Two options. Cut your letters out of the paper template and trace around them onto the cap with chalk — cleanest method. Or lay the whole template on the cap and mark key anchor points (letter corners, border corners, the midpoint of each side) through with chalk dots, then connect them freehand.
Never mark the cap in pen or permanent marker. Chalk brushes off; ink telegraphs through the gaps between stones forever. Mark in something removable, always — same principle as putting stones on fabric.
Now decide orientation. Put the cap on, point facing forward, and have someone photograph you from behind and slightly above. That's the angle almost every ceremony photo gets taken from. Whatever reads right-side up in that shot is your correct orientation. Get this wrong and your beautiful lettering is upside down in every picture your family takes.
Step 4: Outline your letters in SS10
Outlines first, always. Squeeze a small puddle of glue onto a scrap of card — never straight onto the cap. Hold each stone on your wax pencil, dip its back, wipe the excess on the card edge, place it, move to the next. On a rigid board with tight SS10 lettering, dipping beats the dot method I use on fabric: a glue bottle tip can't reach between placed stones without nudging them.
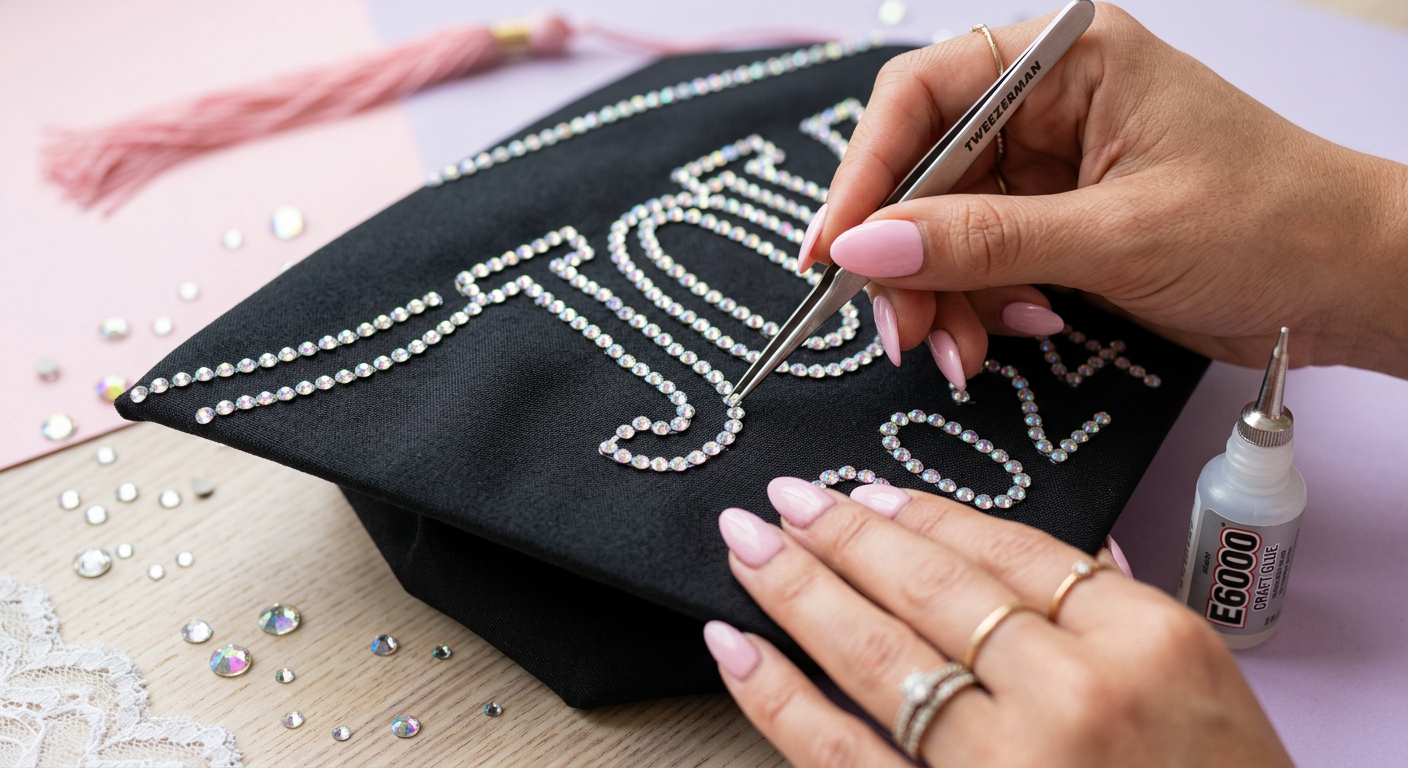
Work one letter at a time and follow your chalk line stone by stone, leaving a hairline gap between each one. Butting stones flush looks tempting but leaves no room for adjustment and creates visible glue squeeze-out. SS10 stones are about 2.8mm, so a letter outline path of 9 inches takes roughly 78 stones.
Corners are where letters live or die. On a sharp corner, place one stone exactly at the vertex first, then work outward down both legs. If you work into a corner from one side, you'll arrive with an awkward half-gap.
Step 5: Fill with SS16
Once outlines are done, fill the interiors with SS16. For fills you can switch back to glue dots — the rows are wide enough for the bottle tip. Fill in rows that follow the letter's shape rather than straight horizontal lines — a curved letter filled in horizontal rows looks pixelated.
Leave a one-stone gap between your fill and your outline if you want the letter to pop; fill flush to the outline if you want a solid heavy look. Both are correct. Pick one and be consistent across every letter.
Step 6: Background fills and borders
Borders go on last so you can true them up against everything else. Run a chalk line 0.25 inches in from each edge and follow it. Start at the corners, place a stone precisely in each one, then work toward the middle of each side so any spacing error lands where the eye doesn't check.
For ombré or full fills, work in 2-inch bands and complete each band before moving on. Half-finished bands dry with visible seams.
Step 7: Dry, then actually cure
This is the step people skip and regret. Gem-Tac sets in about an hour but wants 24 hours for full strength. E6000 is tackier faster — the manufacturer's E6000 product page lists roughly 2 minutes to tacky and 10 minutes to begin setting, but a full 24 hours to cure, with maximum bond strength taking up to 72 hours.
So: 24 hours minimum, flat, untouched, before the cap goes anywhere. Not in a bag. Not on your lap in the car. Flat on a table, top up.
Your Grad Cap Countdown: When to Start
Count backward from your ceremony. Full coverage or ombré? Use the same countdown, but start stoning at 5 days out and split the fill across days 5, 4 and 3.
2 weeks out — Order stones and glue online. Shipping eats days; buying in store buys you a week back.
5 days out — Measure the cap. Sketch on paper until you love it.
4 days out — Transfer the layout in chalk. Do a 10-stone test patch in a corner to confirm your glue grabs the fabric.
3 days out — Outline everything. This is the long, fiddly session. Stop when your hands get shaky; shaky hands place crooked stones.
2 days out — Fills, borders, and any regluing of loose stones. All glue work ends tonight.
1 day out — Hands off. It lies flat and cures. Regluing now means uncured stones tomorrow.
Ceremony day — Transport it properly, wear it, walk.
If you only have two days: a border plus the year outline, 510 to 600 stones — with all gluing finished on evening one so the glue still gets a full 24 hours before the walk. It photographs better than a rushed full fill with gaps in it.
Ceremony tomorrow? Don't glue tonight. Go for a removable topper panel (see the rented-cap FAQ) or wear it plain — uncured stones will shed on stage.
Getting the Cap There in One Piece
You did nine hours of work. Don't lose stones in the car.
Put the cap flat in a shallow box — a shirt box or a shoebox lid works. Lay a sheet of tissue over the stones, not a towel; terry loops catch on crystal facets and lift them. Never put a bedazzled cap in a tote bag with anything else in it.
Carry a repair kit: a few spare stones in a pill container and a mini tube of glue. If one pops off in the parking lot you have five minutes to fix it, and nobody will ever know.
And this genuinely matters — do not stack anything on the cap. The board flexes, and a flexing board pops the outer edge stones first, which are the ones that frame everything.
Common Mistakes
Gluing over or right up against the button. The tassel has to swing. Keep an inch clear and it will.
Getting the orientation wrong. Photos come from behind and above. Test it with your phone before you glue anything.
Starting the night before. Uncured glue plus a car ride equals a trail of crystals down the aisle. Two days is the floor — and only for a border or outline with all gluing done on night one. Three for anything with a fill.
Using stones that are too small. SS6 and SS8 look adorable on your desk and disappear completely from twenty feet. Anything meant to be read in a photo should be SS16 or bigger. This is the biggest difference between a cap and a project like bedazzling a shirt, where people get close enough to see fine detail.
Marking in pen. Chalk only.
Trying to iron on hotfix stones. The board underneath warps, the fabric scorches, and hotfix backing doesn't bond well with glue if you then try to rescue it.
Buying exactly the number of stones you calculated. Always buy 20% extra. You will drop some, and rhinestones vanish into carpet permanently.
After the Ceremony
The cap becomes a keepsake. Store it flat in its box with tissue over the stones — never hang it by the tassel, and never stack anything on the board.
FAQ
How many rhinestones do I need for a graduation cap?
Between 230 and 3,000-plus, depending entirely on your design. A single-row border is about 240 SS16 stones. An outlined year alone is 280–340; outlined and filled, 500–650. Full coverage in SS20 is 1,800–2,500, and past 3,000 in SS16. Buy 20% more than your estimate — dropped stones are a certainty, not a risk. For your specific layout, run how many rhinestones do I need with your cap dimensions and stone size.
Can you bedazzle a rented graduation cap?
Usually not, and you should assume no until your school says otherwise. Rented regalia has to come back in resale condition, and glue-on stones are permanent by design. Some schools rent the gown but sell the cap outright — check which yours does.
The clean workaround: buy a second cap. Plain black mortarboards are cheap and widely available, and they're identical to the rented one in a photo. Decorate the one you own, hand back the one you rented, and skip the damage fee entirely. If you truly can't get a spare, a decorated topper panel cut to size and attached with removable fabric tape is the reversible option — but check your school's policy first, since some ban add-on toppers outright.
How long does it take to bedazzle a graduation cap?
Placement takes 1 to 12 hours depending on your design — about an hour for a single-row border, 3 to 4 for outlined-and-filled lettering, 9 to 12 for full coverage — and the glue needs a full 24 hours to cure before the cap moves. So start three to five days out. Doing it the night before means uncured adhesive on ceremony day, which is exactly when stones fall off.
Five days is comfortable for anything with a fill. Three is fine for outlined lettering or a border. One is not enough for any design, no matter how simple.
What glue works best on a graduation cap?
Gem-Tac or E6000. Gem-Tac is water-based, dries clear, has no fumes, and is formulated specifically for gems and rhinestones on fabric — it's my default for cap work because you can use it at a kitchen table without ventilation. E6000 is stronger and slightly faster to tack up, but it smells and needs an open window.
Either way, apply glue to the stone, not to the cap. And skip hot glue completely: it cools into a visible yellow bead around every stone and cracks off the moment the board flexes.
Related Guides
- How to Bedazzle: The Complete Beginner's Guide — start here if this is your first project
- How to Apply Rhinestones to Clothes — glue, placement and durability fundamentals
- How to Bedazzle a Shirt — the easiest first project after your cap
- 27 Bedazzle Ideas — what to sparkle next
- Rhinestone Calculator — stone counts by surface, size and buffer